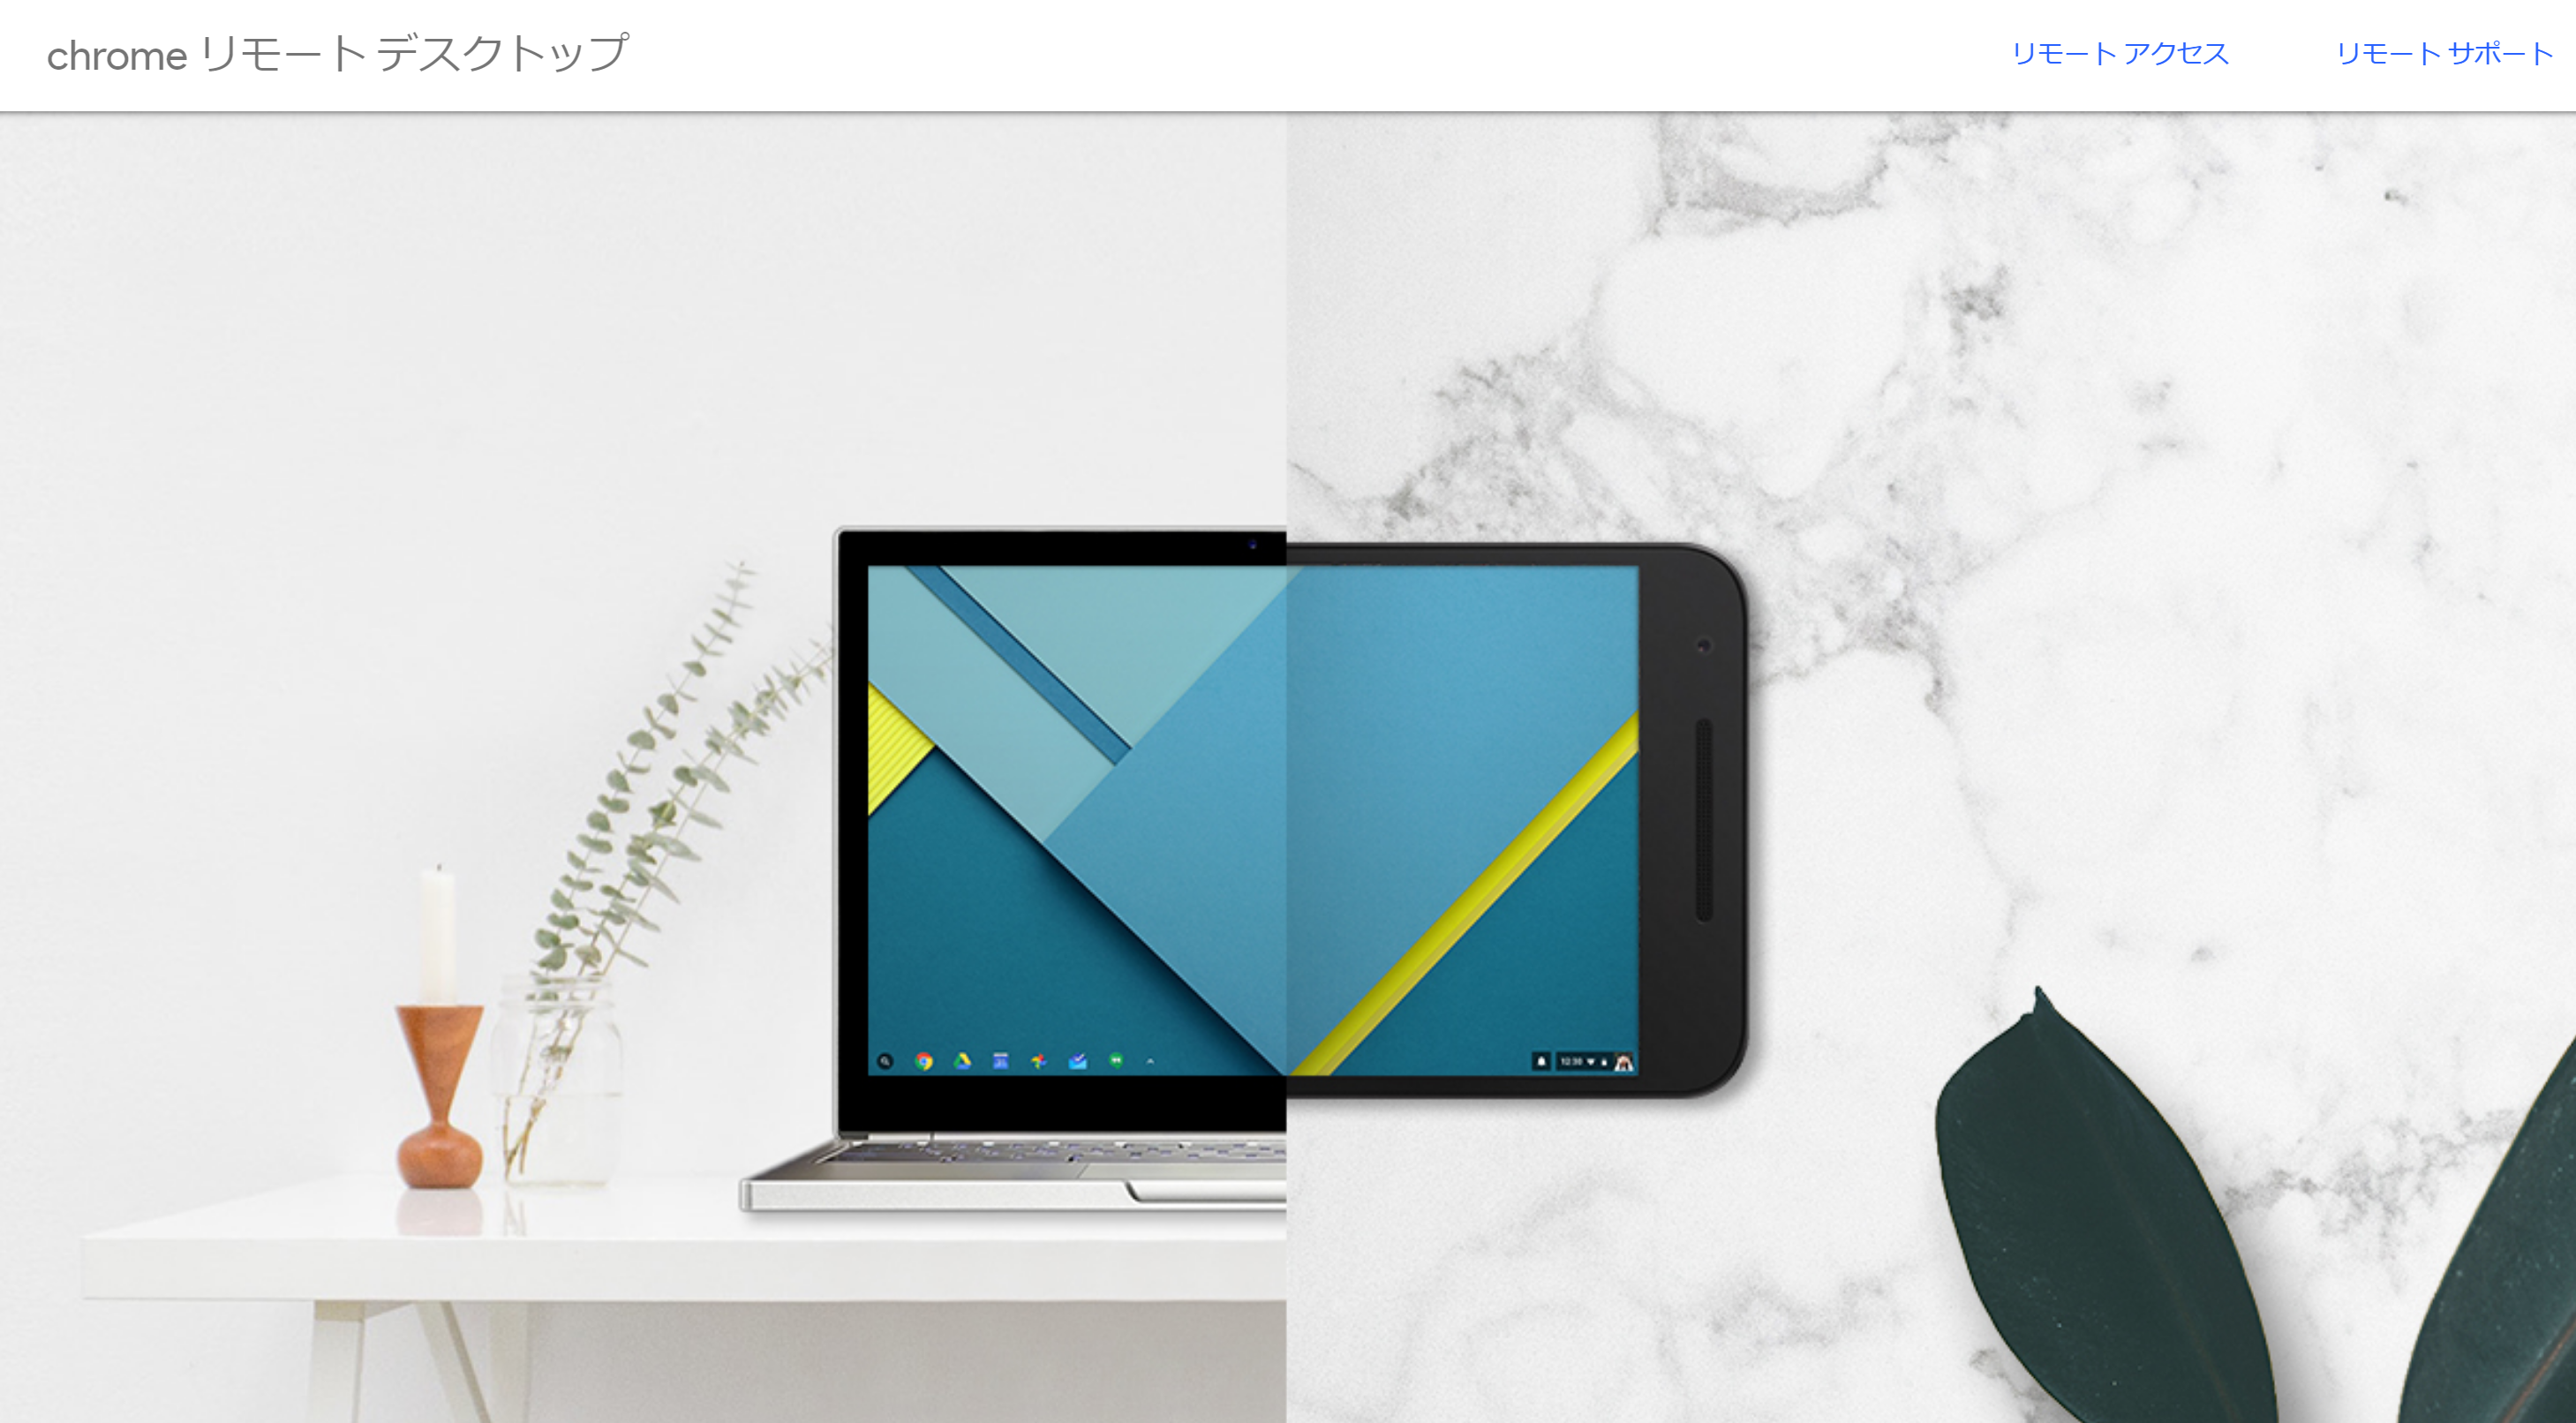
「Chromeリモートデスクトップ」を使うとブラウザだけでリモート接続できます。OSやネットワーク環境に依存しないので超便利!テレワークも簡単に実現できます。
使用方法
Chromeリモートデスクトップポータルにアクセス
以下リンクからアクセスします。
[blogcard url=”https://remotedesktop.google.com/”]リモートデスクトップポータルにアクセスしたら、右上のリモートアクセスをクリック。
初期設定
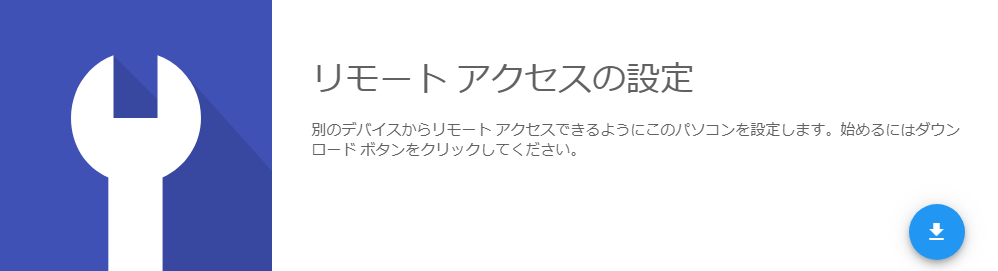
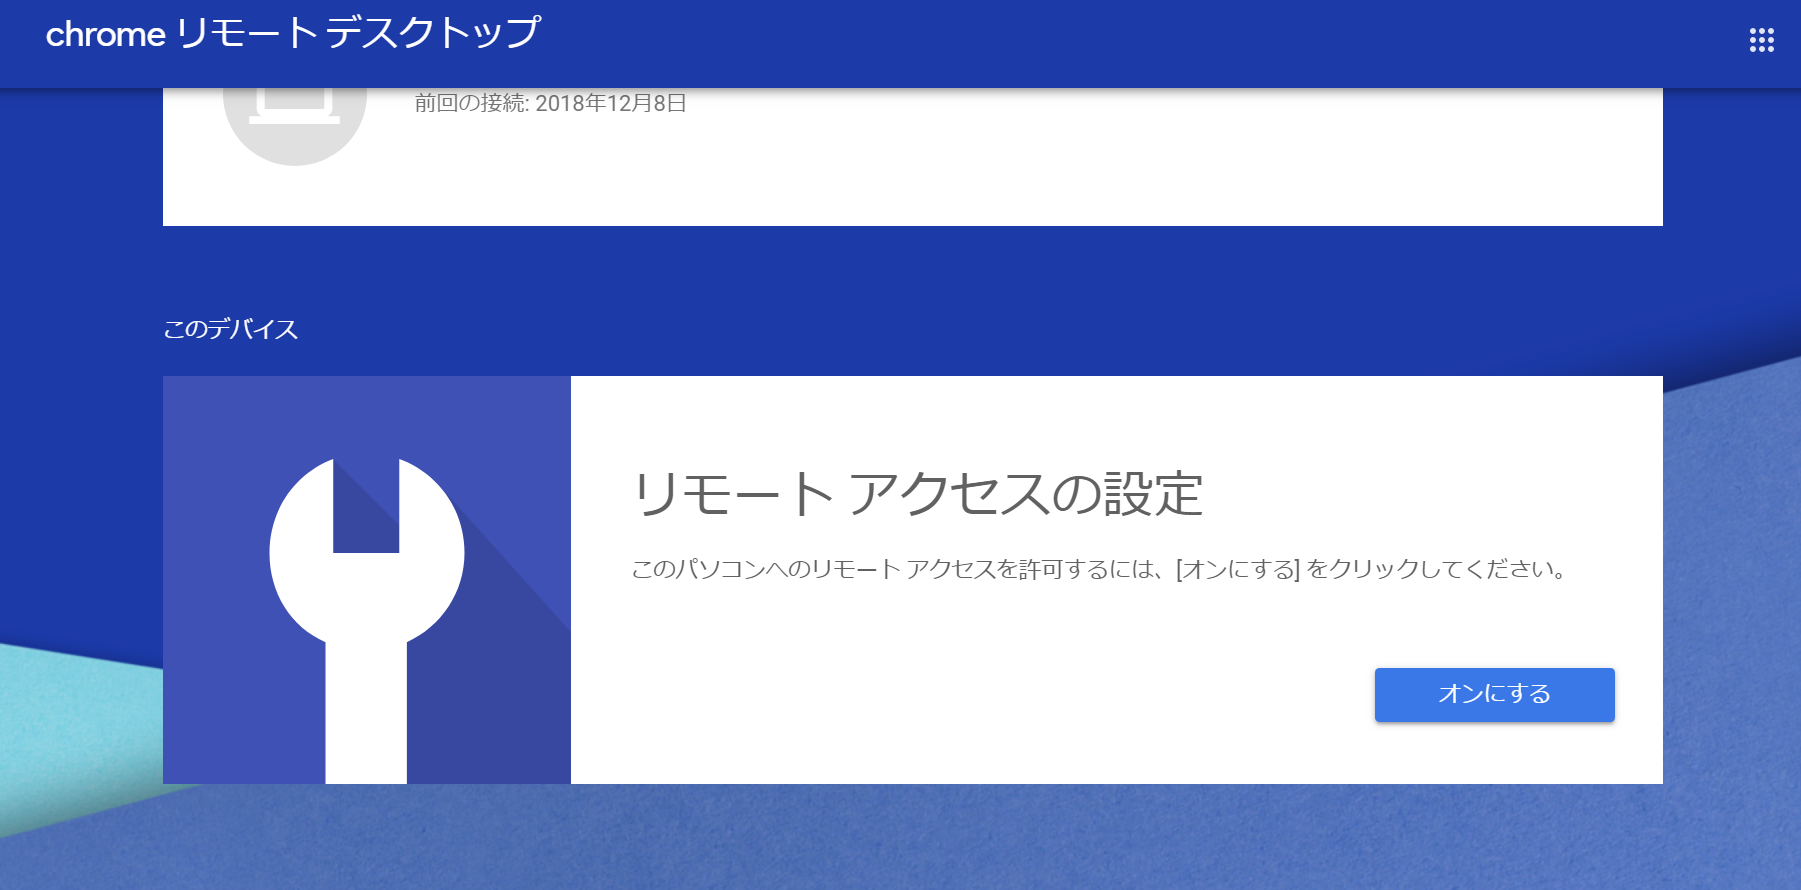
接続する側・接続される側、どちらも初めて使う場合は設定が必要です。リモートアクセスの設定の右下にあるダウンロードボタン(下矢印)をクリック。
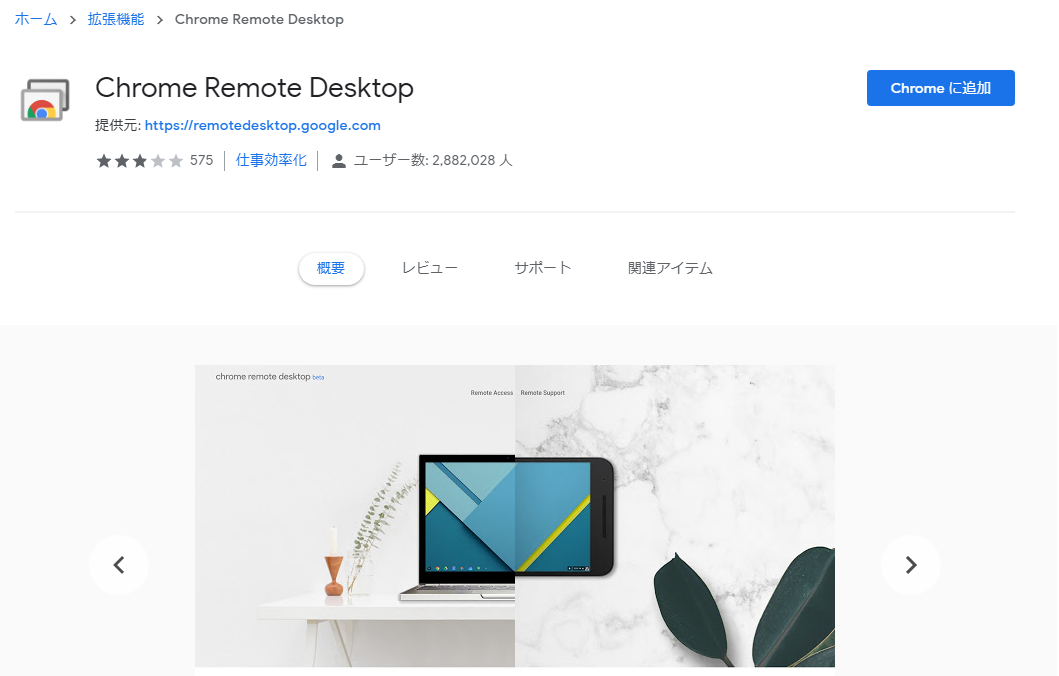
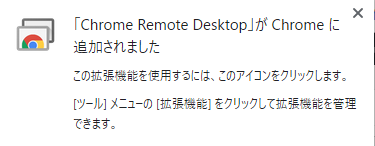
新しいウインドウが開くので、Chromeに追加をクリック。
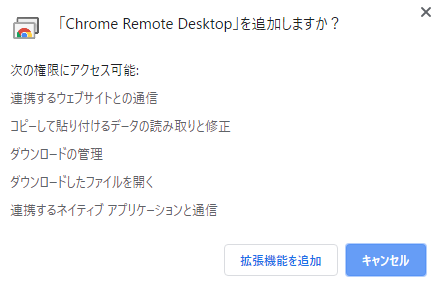
拡張機能を追加をクリック。
このウインドウが表示されれば正常にインストールされています。
リモートアクセスの設定のオンにするをクリック。
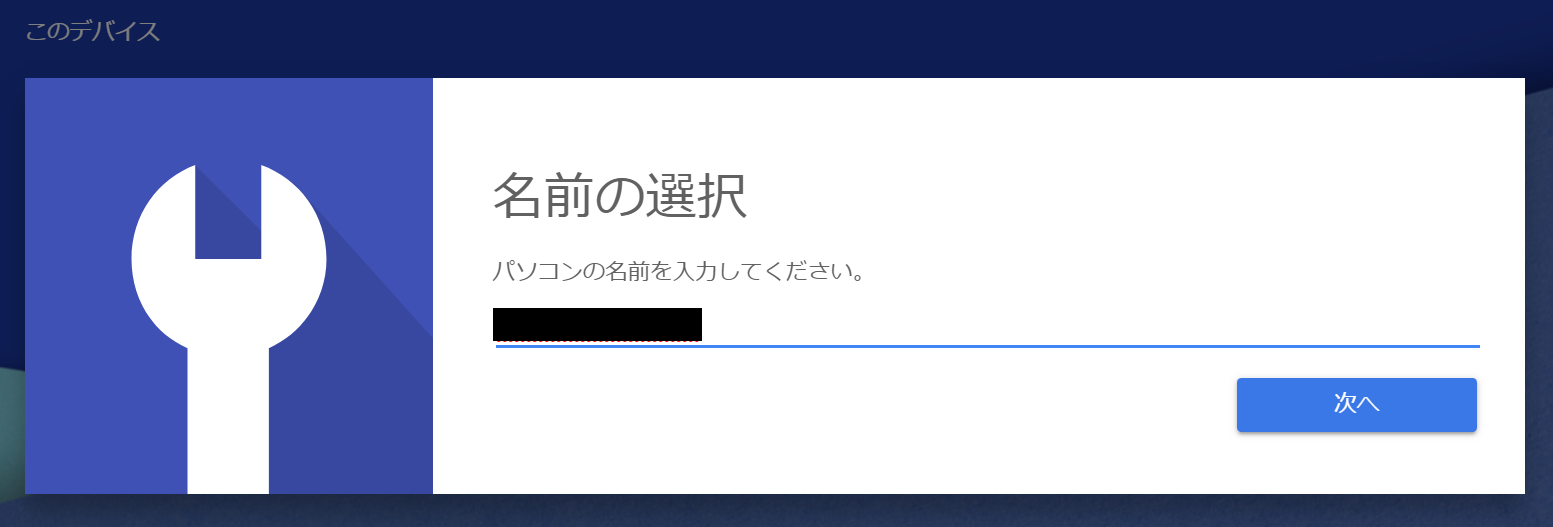
PC名を入力。後で見てわかる名前を入れておきます。入力したら次へをクリック。
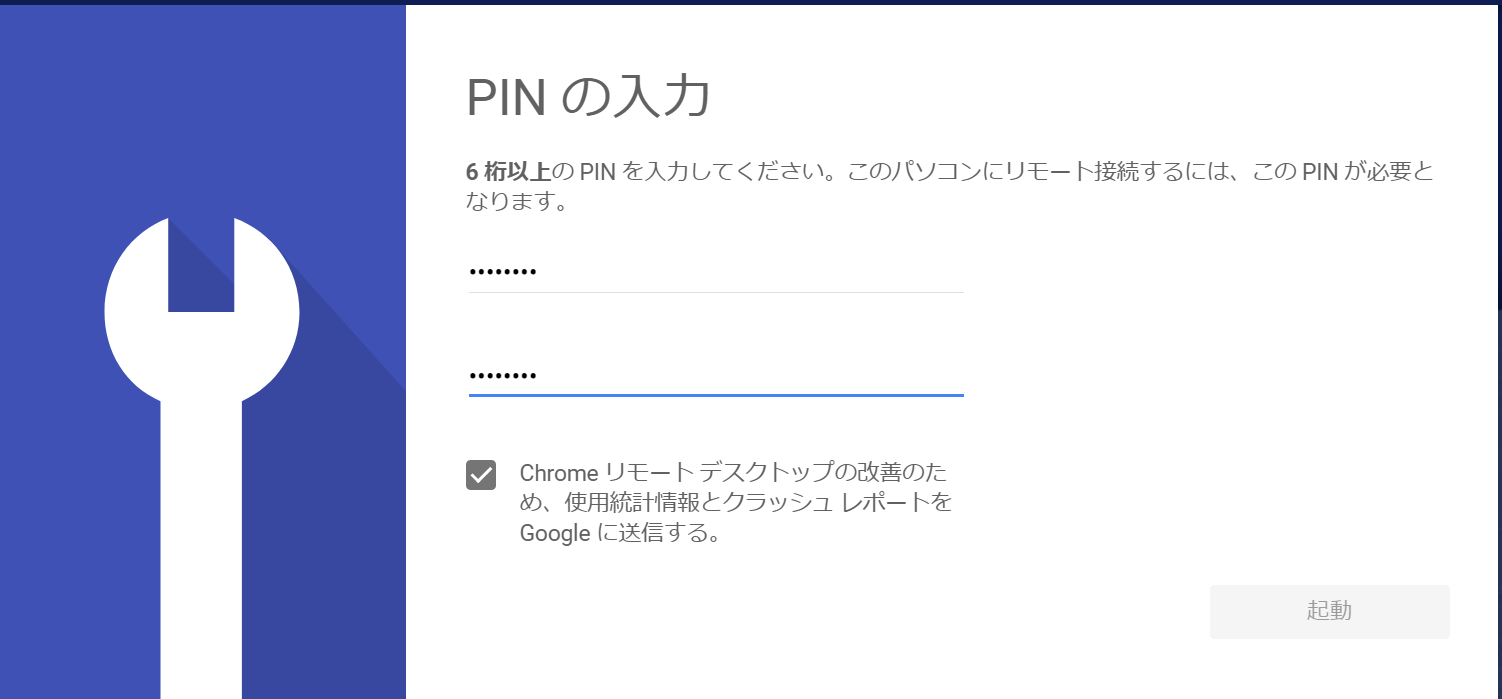
PINコードを設定します。6桁以上の数字を入力して、起動をクリック。
以下のようにオンライン表示になれば準備OK。

リモートアクセス(自分のPCにアクセス)
自分のPC(同じGoogleアカウントで設定したPC)にリモートアクセスする場合はこちら。
自宅から会社のPCにアクセス、またはその逆もできます。
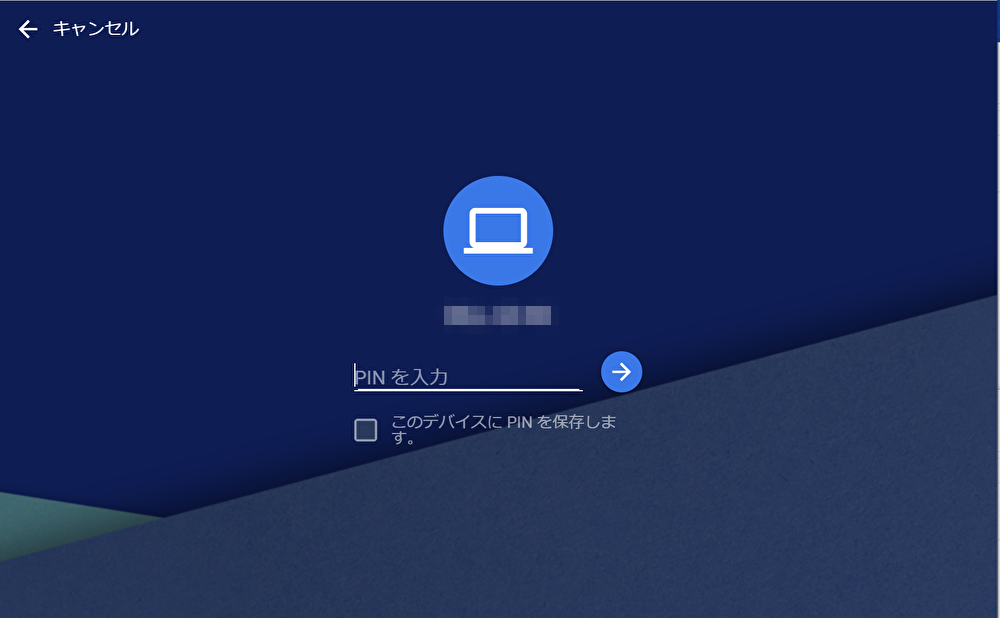
リモートアクセスを選択すると、初期設定したPC一覧が表示されるので、アクセスしたいPCをクリックします。

初期設定したPINコードを入力すれば、リモート操作できるようになります。
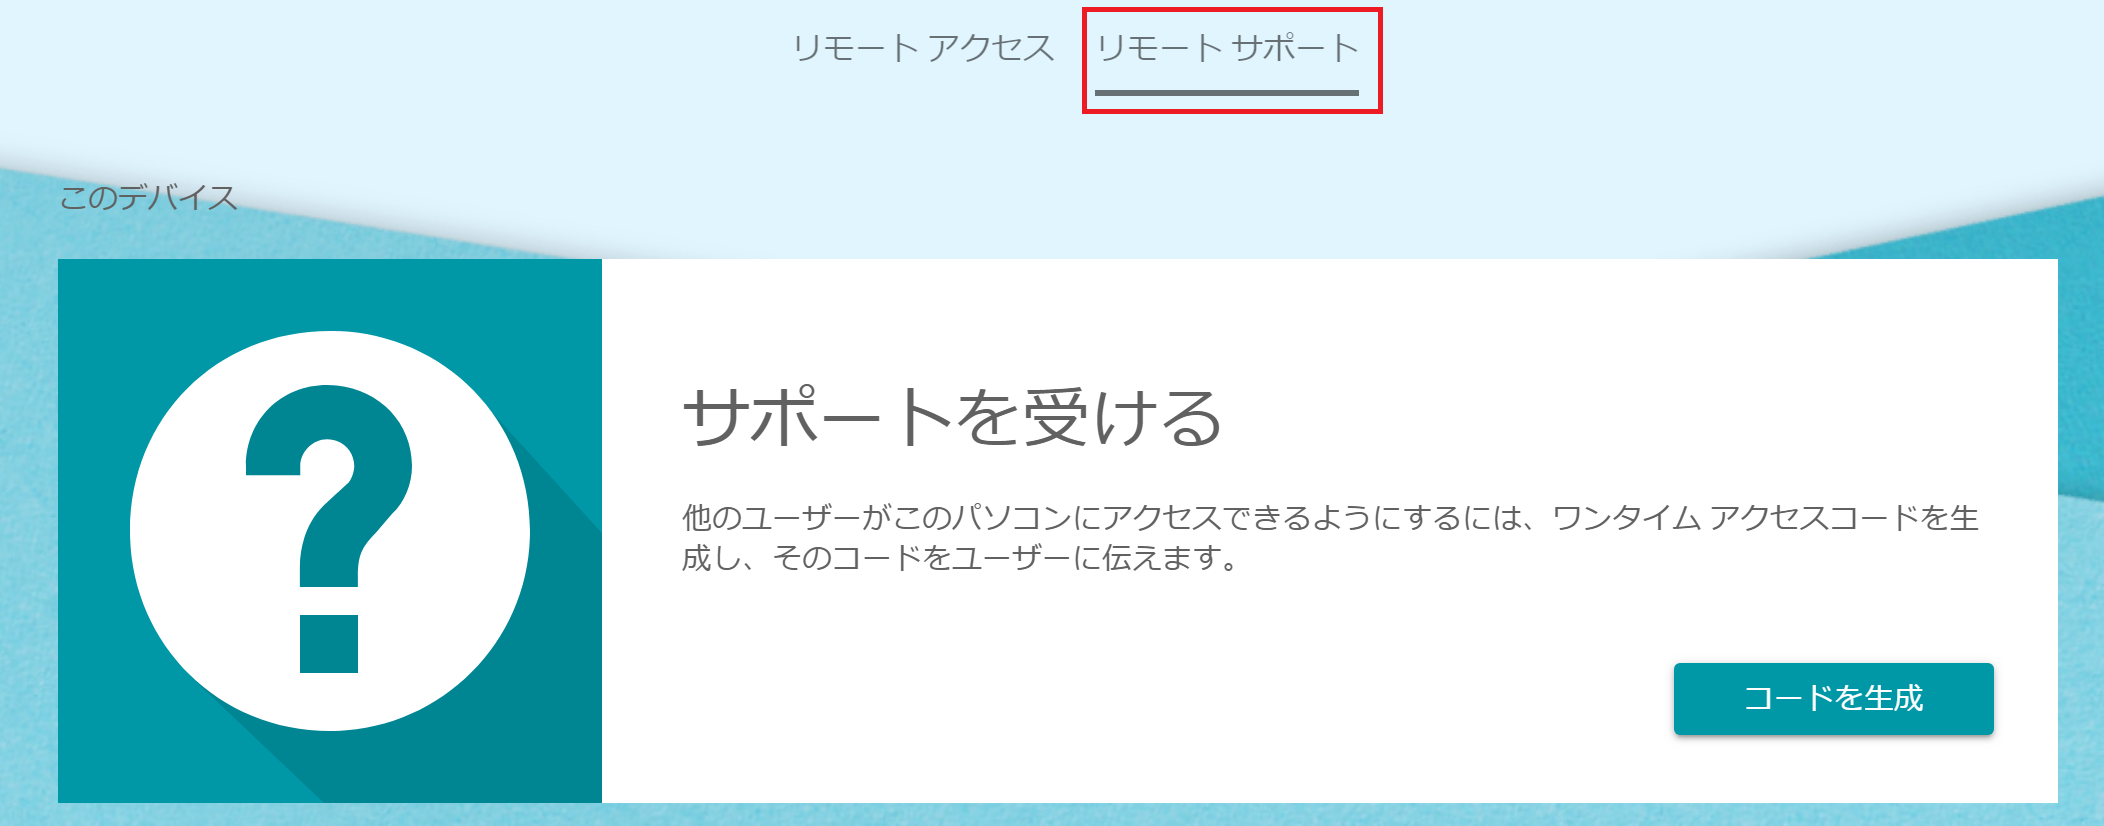
リモートサポート(他者のPCにアクセス)
他者のPC(異なるGoogleアカウントで設定したPC)にリモートアクセスする場合はこちら。
ここからは接続する側・接続される側でそれぞれ操作方法を説明します。
(接続される側)リモートサポートを選択して、コードを生成をクリック。
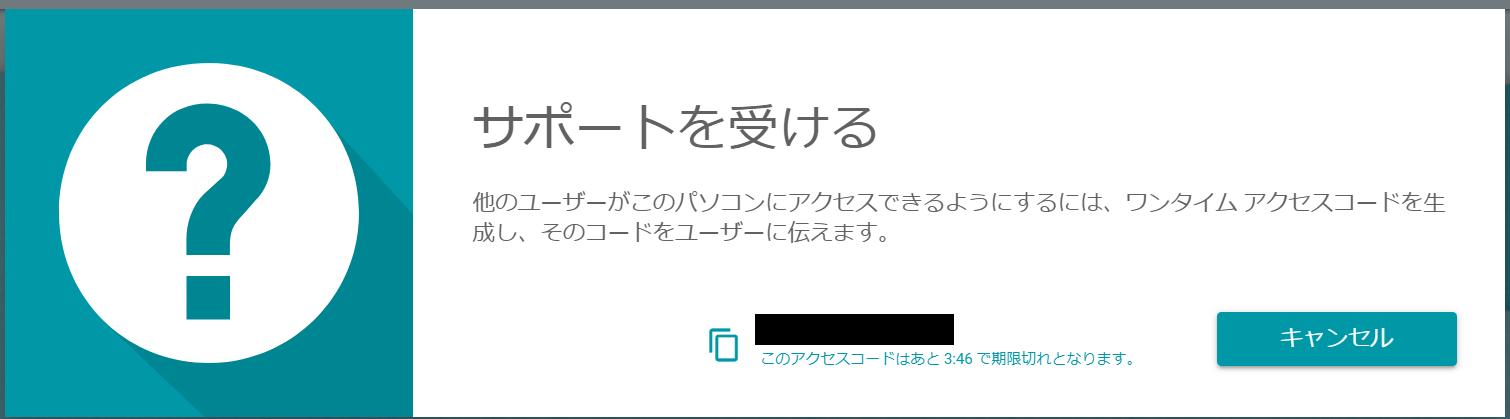
(接続される側)アクセスコードが生成されるので、接続してもらう相手に伝えます。伝え方はSNS等なんでもよいです。
(接続する側)リモートデスクトップポータルにアクセスしたら、右上のリモートアクセスをクリック。
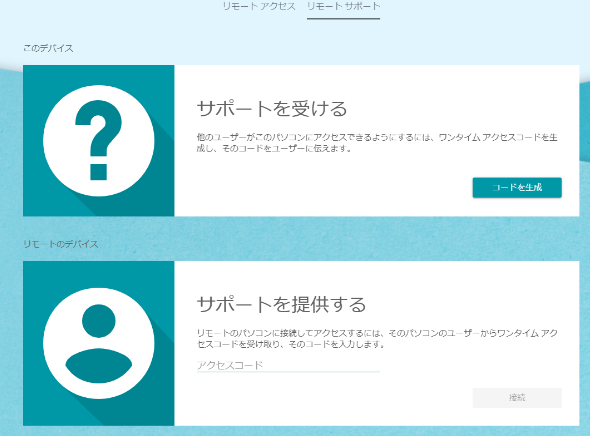
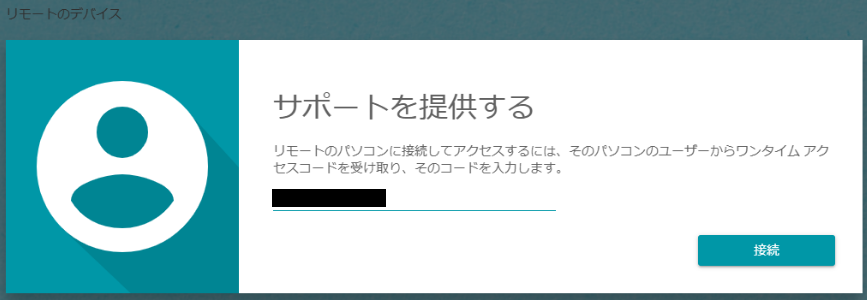
(接続する側)サポートを提供するのウインドウに接続される側からもらったアクセスコードを入力して接続をクリック。
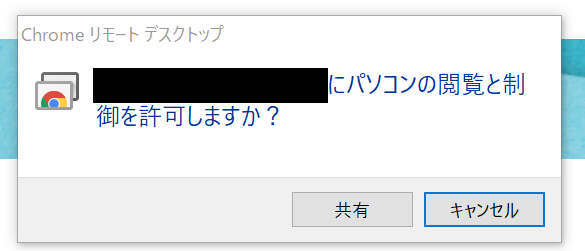
(接続される側)相手がアクセスコードを入力すると以下ウインドウが表示されるので、共有をクリックすることで、リモート接続が開始されます。
(接続する側)接続されるまでしばし待ちます。
(接続する側)Chromeのタブに接続される側のデスクトップが共有され、リモート操作できるようになります。

(接続する側)Chromeリモートデスクトップのタブにリモート接続した画面が表示されます。

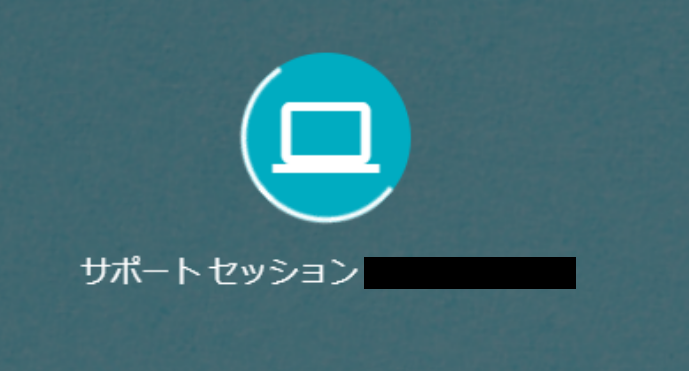
(接続する側・接続される側)接続中は以下のウインドウが表示され、共有中であることが分かります。終了するときは共有を停止をクリック。

(接続する側・接続される側)共有を停止すると以下メッセージが表示されてリモート接続が切断されます。